
How to Test a Water Heater Thermostat
Understanding How Water Heater Thermostats Work
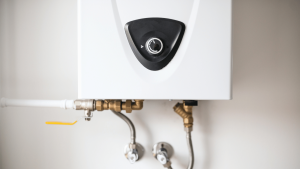
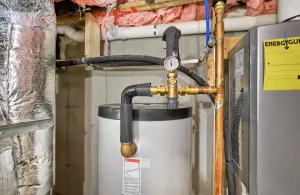
Electric water heaters rely on thermostats to control heating elements inside the tank. These thermostats regulate the temperature of your home’s hot water system by activating the upper or lower element based on the tank’s internal temperature.
Most systems use two thermostats: an upper thermostat and a lower thermostat. The upper thermostat powers the upper heating element first. Once it reaches the set thermostat temperature, it hands off power to the lower thermostat, which then heats the remaining water in the lower part of the tank.
Thermostats include a built-in high-limit reset switch. If the water gets too hot, this switch cuts off power to the elements to prevent overheating. Understanding this sequence is key when learning how to test water heater thermostat function correctly and safely.
Signs of a Faulty Water Heater Thermostat
If your water heater is not working properly, the thermostat may be the issue. Common signs include:
-
No hot water at all
-
Water that heats slowly or not enough
-
Hot water running out quickly
-
Inconsistent water temperature
-
Reset button tripping frequently
-
High electricity bills from a heater that won’t shut off
Any of these problems could mean your heater thermostat needs attention or replacement. Since both thermostats affect your system, a failure in either one can impact performance and water heater efficiency. That’s why it’s important to understand how to test water heater thermostat components before jumping to conclusions.
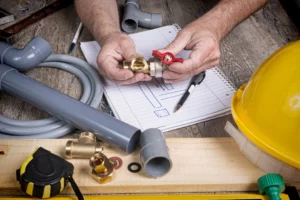
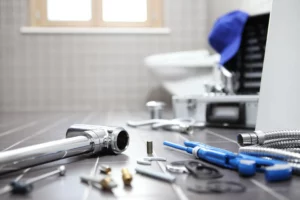
What You Need to Test a Thermostat
To test your electric water heater thermostat, gather the right tools:
-
A digital multimeter with resistance and voltage settings
-
A non-contact voltage tester
-
A flathead screwdriver
-
Electrical tape
-
Safety gloves and goggles
-
Flashlight for visibility if needed
These tools are essential for safely testing electric thermostats, terminals, and voltage connections. When preparing how to test water heater thermostat issues, these basic tools ensure accurate and safe results.
Turning Off Power Before Testing
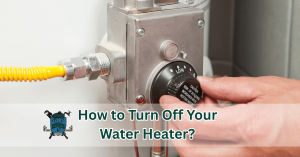
Safety is the top priority when working with electric water heaters. Go to your electrical panel and turn off the breaker for your heater. Use a non-contact voltage tester to check the line voltage at the thermostat terminals. Only proceed once you confirm there is no power to the system.
Testing electric systems without verifying a power cut-off can result in serious injury or damage. Always double-check voltage at both upper and lower access points when you begin learning how to test water heater thermostat components correctly.
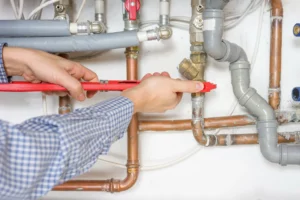
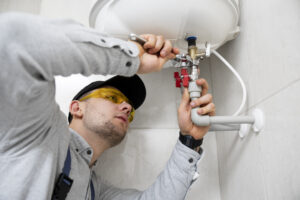
Accessing the Thermostats Safely
Remove both upper and lower access panel covers on your water heater. Under each panel is a layer of insulation—peel this back to reveal the thermostats and heating elements. You will see wiring and terminals on each thermostat.
Remove any plastic safety shields carefully and store all parts for reassembly after testing. Take note of the wiring layout so that everything is restored correctly after the thermostat test. All these steps are essential parts of how to test water heater thermostat setups with confidence.
How to Test the Upper Thermostat
Start with the upper thermostat. Set your multimeter to ohms (Ω). Touch one probe to the terminal connected to power and the other to the heating element terminal.
If the thermostat is calling for heat, you should see low resistance (close to zero). If the thermostat is satisfied and not calling for heat, you should see infinite resistance. Press the red reset button and check again. If the reading does not change properly depending on the tank’s heat level, the thermostat is likely stuck or defective.
Knowing how to test water heater thermostat readings on the upper unit will help identify if your upper heating element is functioning properly or not.
How to Test the Lower Thermostat
Move to the lower thermostat. With the multimeter still on resistance mode, test between the common terminal and the element terminal.
If the tank’s lower section is cold and the upper thermostat has passed control, the lower thermostat should read near zero ohms. If you still see infinite resistance under these conditions, the lower thermostat may be faulty.
This step is key in how to test water heater thermostat performance for the entire tank, especially when dealing with fast hot water depletion or uneven temperature.
What the Multimeter Readings Mean
Proper readings for a working thermostat:
-
0 to 1 ohm: Circuit is closed and heating is active
-
Infinite resistance: Circuit is open and not heating
-
No change with temperature or reset: Faulty thermostat
If your upper thermostat doesn’t switch or send power to the lower thermostat, your system may never fully heat. If the lower thermostat is stuck open or closed, you may get partial heating or overheating.
These interpretations are central to understanding how to test water heater thermostat terminals and element behavior accurately.
Testing Thermostat Voltage (Advanced Users Only)
For experienced homeowners, testing voltage with the power on can give deeper insight. Set the multimeter to AC voltage and test across thermostat terminals.
When the thermostat is active, you should read 240 volts. If there’s no voltage at the terminals even when the tank is cold, the thermostat may not be functioning properly or the high-limit switch may be open.
Because of the risks, live voltage testing should only be performed by professionals or skilled DIYers. If unsure about how to test water heater thermostat terminals with live voltage, call a licensed plumber instead.
Checking the Heating Elements
Before replacing thermostats, test the heating elements. A failed element can mimic thermostat issues.
Disconnect the wires from the element terminals. With the multimeter set to ohms, touch the probes to the two terminals. You should see 10 to 30 ohms. Infinite resistance means the element is burned out. Zero ohms or continuity to the metal tank indicates a shorted element.
Knowing how to test water heater thermostat circuits also means checking the heating elements thoroughly to rule out false positives.
Replacing a Faulty Thermostat
If you determine a thermostat is faulty, replace it with an identical model compatible with your water heater. Turn off power again and detach the wiring from the thermostat. Carefully remove it from the clips that hold it in place.
Install the new thermostat and reconnect the wires as before. Confirm all connections are secure and restore insulation and access panels. Turn the power back on and allow the tank to reheat.
After about an hour, test your hot water to confirm the new thermostat is working correctly. Many homeowners who learn how to test water heater thermostat units find that simple replacements can restore full performance.
When to Call Mad Piper’s Plumbing
Some water heater issues require expert diagnosis, especially when working with live power or unclear results. Mad Piper’s Plumbing provides full thermostat testing, heating element diagnosis, tank repair, and installation services.
If your water heaters are not working as they should and you’re unsure how to test water heater thermostat components properly, give us a call. We’ll check line voltage, thermostat terminals, and tank performance thoroughly and professionally.
We serve Monroe and surrounding Washington communities with fast, reliable water heater repair and replacement. Our services also include plumbing inspections, element replacements, thermostat installation, and full tank system evaluations.
The Importance of Preventative Maintenance
To avoid thermostat and element failures, keep your water heater maintained. Routine care reduces scale buildup, which can affect heating performance and thermostat accuracy.
Annual maintenance tasks include:
-
Flushing the tank to prevent sediment damage
-
Inspecting the anode rod to protect against corrosion
-
Testing the pressure relief valve
-
Verifying thermostat function and temperature settings
Preventative care extends the life of water heaters and avoids emergency heater repairs. Many maintenance appointments begin with a simple call from homeowners asking how to test water heater thermostat components before deciding on service.
Why Trust Mad Piper’s Plumbing
Our plumbing team offers professional thermostat testing and repair for electric water heaters. Whether it’s an upper thermostat, a stuck thermostat, or faulty thermostat terminals, we’ll identify the issue and repair it properly.
We bring reliable tools, knowledge of electric water systems, and honest customer service to every job. From heater thermostat testing to full tank installation, we’ve got you covered.
Homeowners across Monroe, Everett, Snohomish, and nearby cities choose Mad Piper’s Plumbing (MADPIPP781QZ) for dependable plumbing services and electric water heater expertise.
Knowing how to test water heater thermostat components helps you troubleshoot heating issues quickly and safely. Using the right tools and methods, you can identify problems with upper and lower thermostats, check thermostat temperature readings, and evaluate heater performance.
If you’re unsure or want fast, expert help, Mad Piper’s Plumbing offers full heater thermostat test and repair services. Whether it’s voltage testing, stuck thermostat replacement, or heating element repair, we’ll ensure your water system is back to optimal performance.
Schedule service with Mad Piper’s Plumbing today and restore reliable hot water to your home. Call at (360) 515-4549